How to repair car fiberglass

How to repair car fiberglass
What we have here is some sort of race car part for on of our customers, we have repaired various part of it before, the nosecone was most recently documented in the forum. Repairing car fiberglass is pretty well the same as anything else, car fiberglass is glass fibers in polyester resin. I am going to reference my manual along the way to ensure everything is done by the books.
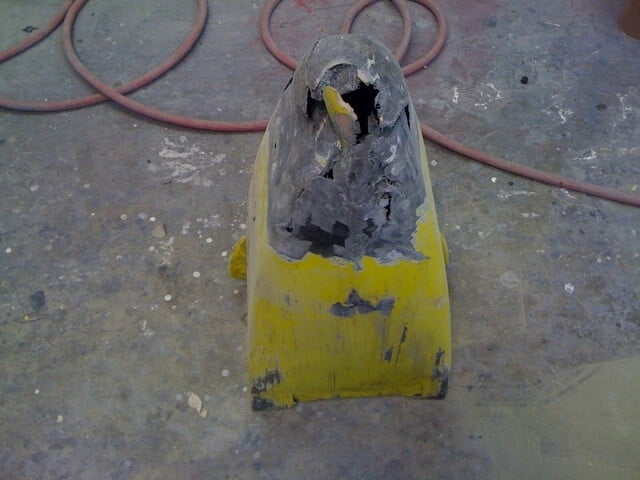
Here is a picture of our part, and also the crack we are to repair. This is just a panel of the car, I\’ve never actually seen the race car before, only pieces of it!
We are going to start by cleaning the fiberglass part with wax and silicone remover, here is an example of an acceptable product:
Once cleaned we will grind out the crack on both sides to about a 30 degree slope on both sides. Then we will sand with 80 grit paper a few inches beyond. Here is our crack after tapering it out and sanding back with 80 (more of a hole now):
and here is what we are going to do for a repair:
At this point we cut up a few pieces of fiberglass mat into sizes to fit our hole and grind out bevel. I\’d like to get two pieces on the back and one on the front side of the hole.
They are next to be saturated in Fiberglass Resin , usually just called a polyester resin, the resin must first be activated with a liquid hardener and stirred. It is good to have a brush to spread out the resin after too, here is an example of an acceptable resin for this kind of repair:
Mix up enough for one cloth on the cosmetic side and get one piece of cloth soaked in resin, place it over the hole and let it tack up. Depress into the hole and form a bit of a saucer indent, it should tie to your grinding bevel and dip into the hole. Mix up a bit more resin, soak some more cloth and apply a few pieces of cloth/resin to the backside, brush on a bit more rein and bring it out into your 80 scratches. You may need to sand the front side of the fiberglass car part before the next step, you want to mix up just resin and fill your depression with it to level the surface. Once dry, just block sand with some 120-180 and your repair is done.
Car fiberglass parts are found on various makes and models, on this race car I sanded down the backside since I don\’t know the clearance and re coated it with a black paint. If nothing fits up behind it you could just leave it as is, just wanted to be safe. From here it is prepped like anything else, one key note is avoid baking fiberglass as it warps easily. I am not a big fan of fiberglass parts on a car, but what can you do. I personally find the rippling look it gives a tad cheap, especially on the very low quality parts. Anyhow, that\’s just my 2 cents….Also remember to cover your skin when working with fiberglass or it will make you very itchy, also the gel-coat is very bad for you so where a mask when sanding.
***Update***
I decided that since I have the fiberglass nosecone I should maybe make a cast of it for future repairs. Here is an example of how they come back to me:
And I am asked to restore it to this:
(that is the color all the fiberglass parts I have are being painted btw). The problem with fixing it without a cast is I go through a ton of heavy fiberglass filler, with this I should be able to get a better shape and keep the weight to a minimum. Here is the new nosecone with some tape along it, paper hanging off and the whole thing waxed with car wax:
Next I place some clothe on and pour over some resin, spreading it out with a brush.
After letting it dry I pry it away carefully and have a cast to help me with future repairs:



Can you repair the risers on a Cobra spoiler? They are cracked and I can’t find a replacement since the car is a 96
Can you repair the risers on a Cobra spoiler? They are cracked and I can’t find a replacement since the car is a 96